UIView 代表一个矩形的显示区块,这个区块里面,可以包含各种按钮,文字等等子物件,UIView 本身也有一些基本的 Method 可以使用,如填满背景色(backgroundColor),边框(Border),而子物件可以透过 addSubview 加进 UIView 里,那我们就能够创造多个 UIView 来完成各种页面。
UIView 还能够包含其他的 UIView ,透过多个小型的 UIView 去组成较大型的 UIView,这样方便程式的扩充与维护,在维护方面,我们一次只需要修改一个小小的 View ,比起一次修改一个大型的 View 会方便很多,而在扩充方面,每一个小的 View 可以快速的被其他更好的 View 取代,更方便的强化 UI 的呈现。
UIView 显示区域
UIView 的显示区域有三个要素,分别是 frame, bounds, center。 「frame」 储存 View 的座标 (x, y )与宽、高,「center」 是指 View 的中心点,当 View 有放大、缩小,旋转功能时,就必须靠中心点来定位,「bounds」 则是 View 可画图的区块,bounds 也包含座标与宽高,但座标的原点是以 frame 的 x , y 为准,所以通常 bounds 的 x 与 y 就是 (0, 0),而宽高就是 frame 的宽高。
建立一个 UIView
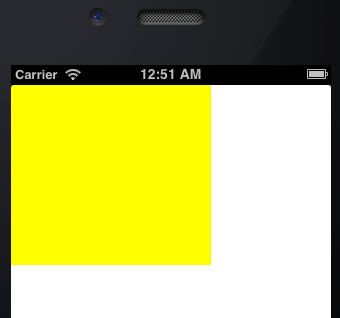
我画一个 座标 (0, 0),宽 200 ,高 200 的 View。
- self.window = [[UIWindow alloc] initWithFrame:[[UIScreen mainScreen] bounds]];
- self.window.backgroundColor = [UIColor whiteColor];
- [self.window makeKeyAndVisible];
- CGRect viewRect = CGRectMake(0, 0, 200, 200);
- UIView* myView = [[UIView alloc] initWithFrame:viewRect];
- [myView setBackgroundColor:[UIColor yellowColor]];
- [self.window addSubview:myView];
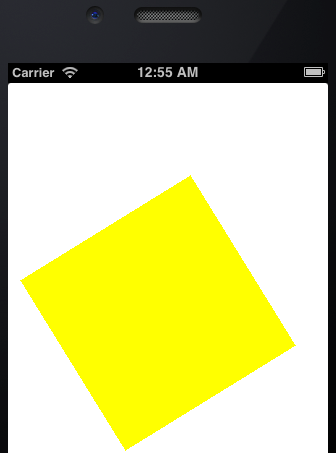
View 的旋转
使用 transform = CGAffineTransformMakeRotation(45); 这能够将 View 逆时针旋转 45 度。
- self.window = [[UIWindow alloc] initWithFrame:[[UIScreen mainScreen] bounds]];
- self.window.backgroundColor = [UIColor whiteColor];
- [self.window makeKeyAndVisible];
- CGRect viewRect = CGRectMake(50, 150, 200, 200);
- UIView* myView = [[UIView alloc] initWithFrame:viewRect];
- [myView setBackgroundColor:[UIColor yellowColor]];
- myView.transform = CGAffineTransformMakeRotation(45);
- [self.window addSubview:myView];
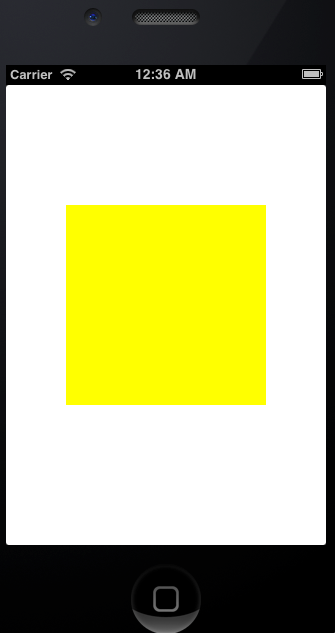
缩小 View bounds 的宽、高,会使得 View 由中心点开始缩小。
UIView* view = [[UIView alloc ] initWithFrame:self.window.bounds ]
透过上一行 code 可以建立一个满版的 View,但是我再透过 bounds 的设定将 bounds 缩小,这时 View 就会由中心点开始缩小。
- self.window = [[UIWindow alloc] initWithFrame:[[UIScreen mainScreen] bounds]];
- self.window.backgroundColor = [UIColor whiteColor];
- [self.window makeKeyAndVisible];
- UIView* view = [[UIView alloc] initWithFrame:self.window.bounds];
- [view setBackgroundColor:[UIColor yellowColor]];
- CGRect b = CGRectMake(0, 0, 200, 200);
- view.bounds = b;
- [self.window addSubview:view];
用 Xcode UI 建立 UIView
Xcode 提供了强大的 UI 给使用者快速建立各式各样的 View ,透过 UI 只要滑鼠拖拉住按钮就能轻松的建立各种物件
载入 UIView
透过 loadNibNamed 来载入现有的 UIView。
取得 View 里面的 物件
如果你使用 Xcode 的 UI 来建立 UIView 里面的物件,当你希望透过程式来操作 View 里面的物件时,你必须先对被操作的物件 tag 的属性,例如我将按钮的 tag 设定成 100 ,接著就可以用 [view viewWithTag:100] 取得该按钮 。
- UIView* view = [[[NSBundle mainBundle] loadNibNamed:@"mainView" owner:self options:nil] objectAtIndex:0];
- UIButton *btn = [view viewWithTag:100];
- [btn setTitle:@"test string" forState:UIControlStateNormal];
- [self.window addSubview: view];