2015
Sep
25
图片 - Image
Image
- <Image
- source={{uri: "https://s-media-cache-ak0.pinimg.com/236x/45/1c/4b/451c4b0d921d1bfe7979960e6622a0f6.jpg"}}
- style={{width: 200, height: 250, marginTop: 50, marginLeft: 50}}
- resizeMode={"stretch"}
- />

resizeMode = enum('cover', 'contain', 'stretch') ,当原始图片的尺寸小於或大於 Image 所设定的长与宽,这时系统会自动对图片等比例缩放,透过 resizeMode 可以指定三种模式。
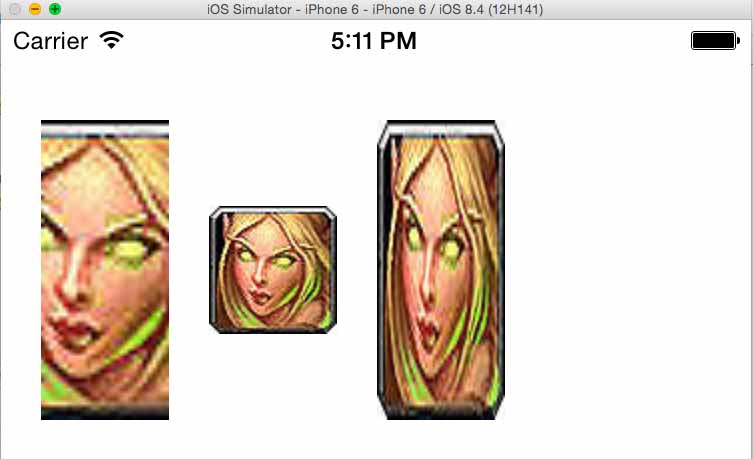
- cover : 等比例缩放,并裁切超过图片边缘的区块。
- contain: 维持原图尺寸,不缩放。
- stretch: 不等比例缩放。
左上的图片,是我测试 resizeMode 的结果,首先我的原图尺寸为 64 * 64 ,然后我用了三个 Image 元件,设定长宽为 64 * 150 ,第一个 Image 我给他 cover ,第二个给 contain ,第三个给 stretch 。
卷轴 ScrollView
horizontal = true ,可以让 scrollView 底下的所有元件预设为水平排列。
removeClippedSubviews = true ,当 scrollView 底下元件的位置超出 scrollView 的可视范围,则会自动移除该元件,这样可以大幅增加 performance 。
alwaysBounceHorizontal = true ,当拖拉水平卷轴,并且超过卷轴可视范围,则会有像弹簧一样的动画效能。
alwaysBounceVertical 当拖拉垂直卷轴,并且超过卷轴可视范围,则会有像弹簧一样的动画效能。
SCrollView
- var images = [
- "https://c1.staticflickr.com/1/662/21805439585_1a7df21361_s.jpg",
- "https://c2.staticflickr.com/6/5689/21793646742_890a3b6820_s.jpg",
- "https://c2.staticflickr.com/6/5809/21793794722_a5dc555ba8_s.jpg",
- "https://c1.staticflickr.com/1/754/21779424246_1ac1a811c9_s.jpg"
- ];
- <ScrollView
- horizontal={true}
- contentInset={{top: -50}}
- style={{backgroundColor: '#F1E7D0', height: 200, paddingLeft: 10}}>
- {images.map(function (img, index) {
- return (
- <View style={{marginRight: 5}}>
- <Image
- source={{uri: img}}
- style={{width: 32, height: 32, borderRadius: 16, borderColor: "#333", borderWidth: 1}} />
- </View>
- );
- })}
- </ScrollView>

回應 (Leave a comment)