Firefox Plugin 製作方式,官方本身就有提供一些 API 的教學,不過這裡先介紹,簡單的使用 Javascript 來完成 Firefox addon,必備的知識有 HTML , css , Javascript,這些基本的網頁程式,可以從網路上輕易的找到教學。
檔案架構
   |---chrome/content/browser.xul
   |---defaults/preferences/pref.js
   |---locale
   |------en-US/translations.dtd
   |------zh-TW/translations.dtd
   |---skin/skin.css
   |---install.rdf
   |---chrome.manifest
- chrome/content/ 這裡存的是內容
- defaults/preferences/pref.js : 這個檔案是設定 addon 的 Firefox config ,你可以在 Firefox 瀏覽器中輸入 about:config ,就可以看到這些設定。
- locale : 多國語系設定。
- skin :
- chrome.manifest : 指定 locale , content . skin 的路徑
Firefox Plugin: install.rdf
install.rdf 是安裝FF Plugin 必備的檔案,這個檔案需要指定、作者、支援的Firefox 版本、addon 名稱等等,其中 targetApplication id 是不可以任何修改的。
先看個範例吧
- <?xml version="1.0"?>
- <RDF xmlns="http://www.w3.org/1999/02/22-rdf-syntax-ns#"
- xmlns:em="http://www.mozilla.org/2004/em-rdf#">
- <Description about="urn:mozilla:install-manifest">
- <em:id>[email protected]</em:id>
- <em:version>1.0</em:version>
- <em:type>2</em:type>
- <em:name>Plugin name 外掛名稱</em:name>
- <em:description>sample , A test</em:description>
- <em:creator>creator</em:creator>
- <em:homepageURL>http://www.ewebsite.com.tw/</em:homepageURL>
- <em:targetApplication>
- <Description>
- <em:id>{ec8030f7-c20a-464f-9b0e-13a3a9e97384}</em:id>
- <em:minVersion>3.5</em:minVersion>
- <em:maxVersion>10.*</em:maxVersion>
- </Description>
- </em:targetApplication>
- </Description>
- </RDF>
- em:id 這是指 Firefox Plugin 的程式id,每個外掛程式都要自已想一個ID 出來,並且不能重覆。
- em:version , Firefox Plugin 版本。
- em:name , Firefox Plugin 名稱,這個名稱也是不能重覆。
- em:creator ,作者
targetApplication
- em:id , Firefox ID 固定不變。
- em:minVersion ,支援的 Firefox 最低版本
- em:maxVersion ,支援的 Firefox 最高版本
Firefox Plugin : chrome.manifest
定義外掛包含的檔案,如語言檔,UI(XUL) ,Javascript ,css file 等等,範例如下。
- content sample chrome/content/
- content sample chrome/content/ contentaccessible=yes
- overlay chrome://browser/content/browser.xul chrome://sample/content/browser.xul
- locale sample en-US locale/en-US/
- locale sample en-TW locale/en-TW/
- skin sample classic/1.0 skin/
- style chrome://global/content/customizeToolbar.xul chrome://sample/skin/skin.css
這裡指定了,我要使用 browser.xul 建立新的 Menu 按鈕,及我指定的語言 locale 檔案路行,另外還有其他相關的內容 content。
Firefox Plugin : browser XUL
XUL (XML User Interface) : 可以新增 UI 畫面在 browser 裡,例如我想要建增右鍵按鈕,工具列選單等等,都可以用 XUL 來達成。
- chrome://sample/locale/translations.dtd : 這是載入多國語言的檔案,我的系統語言是繁體中文,所以外掛會自動載入 locale/zh-TW/translations.dtd 。
建增右鍵選單
- <?xml version="1.0"?>
- <?xml-stylesheet href="chrome://sample/skin/skin.css" type="text/css"?>
- <!DOCTYPE sample SYSTEM "chrome://sample/locale/translations.dtd">
- <overlay id="sample" xmlns="http://www.mozilla.org/keymaster/gatekeeper/there.is.only.xul">
- <script src="jquery.js" /> <!--載入 jquery -->
- <script src="sample.js" /> <!--載入我們的外掛 -->
- <popup id="contentAreaContextMenu">
- <menuitem id="clipboard-text"
- label="&ExtName;" accesskey="F"
- insertafter="context-sep-stop"
- class="menuitem-iconic"
- oncommand="sample.test();"/>
- </popup>
- </overlay>
這裡有使用了 &ExtName; ,這是指有個變數名稱為 ExtName ,他的值是由 locale 的檔案中取得 。
右下角狀態列選單: status button 狀態列的按鈕
- <statusbar id="status-bar">
- <statusbarpanel id="link-target-finder-status-bar-icon" class="statusbarpanel-iconic" src="chrome://linktargetfinder/skin/status-bar.png" tooltiptext="&runlinktargetfinder;" onclick="linkTargetFinder.run()" />
- </statusbar>
工具列的客製化按鈕
- <toolbarpalette id="BrowserToolbarPalette">
- <toolbarbutton id="link-target-finder-toolbar-button" label="Link Target Finder" tooltiptext="&runlinktargetfinder;" oncommand="linkTargetFinder.run()"/>
- </toolbarpalette>
Firefox Plugin locale , translations.dtd
locale 是指多國語言,這裡主要是指定一些變數,並指定翻譯的內容,相當我也把他當作設定檔來使用,設定了 Path 等變數。
- <!ENTITY ExtPath "chrome://sample">
- <!ENTITY ExtName "執行外掛 JS function">
- <!ENTITY sample "test Extension">
Firefox Plugin Content
現在我就先寫一個簡單的 alert 來測試 Plugin功能,首先我在 browser.xul有寫一句 oncommand="sample.test();",所以在 chrome content 中,我就要實做這個 test function。
- (function(){
- window.sample = new sample();
- function sample(){
- }
- var o=sample.prototype;
- o.test=function(){
- alert("執行 test function ");
- }
- }())
打包與安裝 Plugin
打包的方式很簡單,用windows內建的 zip 壓縮即可,這裡要注意不要直接壓縮整個資料夾,只有壓縮資料夾內的檔案就好了,例如 chrome , default, locale ,skin, install.rdf ,壓縮後會自動建立一個副檔名為 zip 的檔案,接著再把副檔名改成 xpi ,最後把 xpi 檔案拖接至 Firefox Browser ,就會自動進入安裝流程了。
Firefox Plugin 開發注意事項
- Thumbs.db 要記得刪除,如果你是使用 Windows 開發, windows 預設會産生圖片的預覽圖,並暫存在 Thumbs.db ,這個檔案是不允許出現的,所以在打包Plugin時,要先刪除這些檔案,或是圖片資料夾不要使用有預覽 icon 的顯示方式。
Firefox Plugin 英文字典
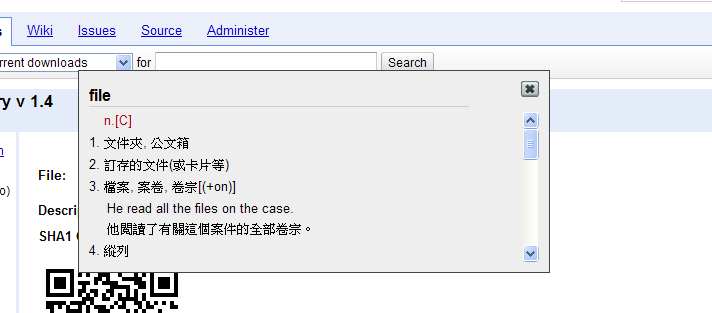
平常在看英文文件,老是有一堆看不懂的單字,又找不到實用 & 簡易的字典Plugin,所以我自已寫了一個英文字典 Plugin。
使用方式很簡單,先反白英文單字,然後按右鍵選字典查詢。